100’s of gun cleaning sessions, and thousands of hours pulling the trigger at the range, and in competitions have convinced me that regularly cleaned guns are easier to maintain, and it saves you time, problems, and money.
Cleaning a firearm is less complicated than most may think. In this article, you will see simplified steps to clean your guns fast and efficiently in 15 minutes or less.
The main areas to clean in a firearm are the breach face, the rifling of the barrel, and the rail of the slide and frame, these are critical areas that directly impact proper functioning and accuracy. Other areas of consideration are components such as trigger mechanism, recoil spring, magazine well, magazines, bolt action (rifle), and firing pin.
Why should you clean your gun?
Most modern firearms are built with tolerances that allow them to function for hundreds -even thousands- of rounds without requiring cleaning in order to function properly; however, the reasons for cleaning a gun can be summarized in two primary concepts:
- To guarantee the weapons proper functioning
- To extend the life of the weapon
Each manufacturer has recommended guidelines for maintenance of their weapons, and it is highly recommended that the end-user reads and becomes familiarized with the process, given that engineers, designers, and experts formulated these maintenance guidelines after rigorous testing. Nevertheless, a large number of firearm owners abide by their own protocols, which usually strays from what is really needed.
In this article, we will provide simple steps to clean a pistol in under 10 minutes.
Because you will be using solvents and cleaning a firearm that inherently has several contaminants in it, it is important that you choose a ventilated place, away from fires, and also from places such as your kitchen or dining tables. You want to prevent these places from contamination from lead and other long-term harmful contaminants. Lead contamination is a very serious thing, trust me, I have lead poisoning.
Weapon’s safety – first thing, first, clearing the hangun of ammunition.
Whether you are a seasoned gun enthusiast or a novice, the following are best practices -and my personal favorites- before cleaning your firearms:
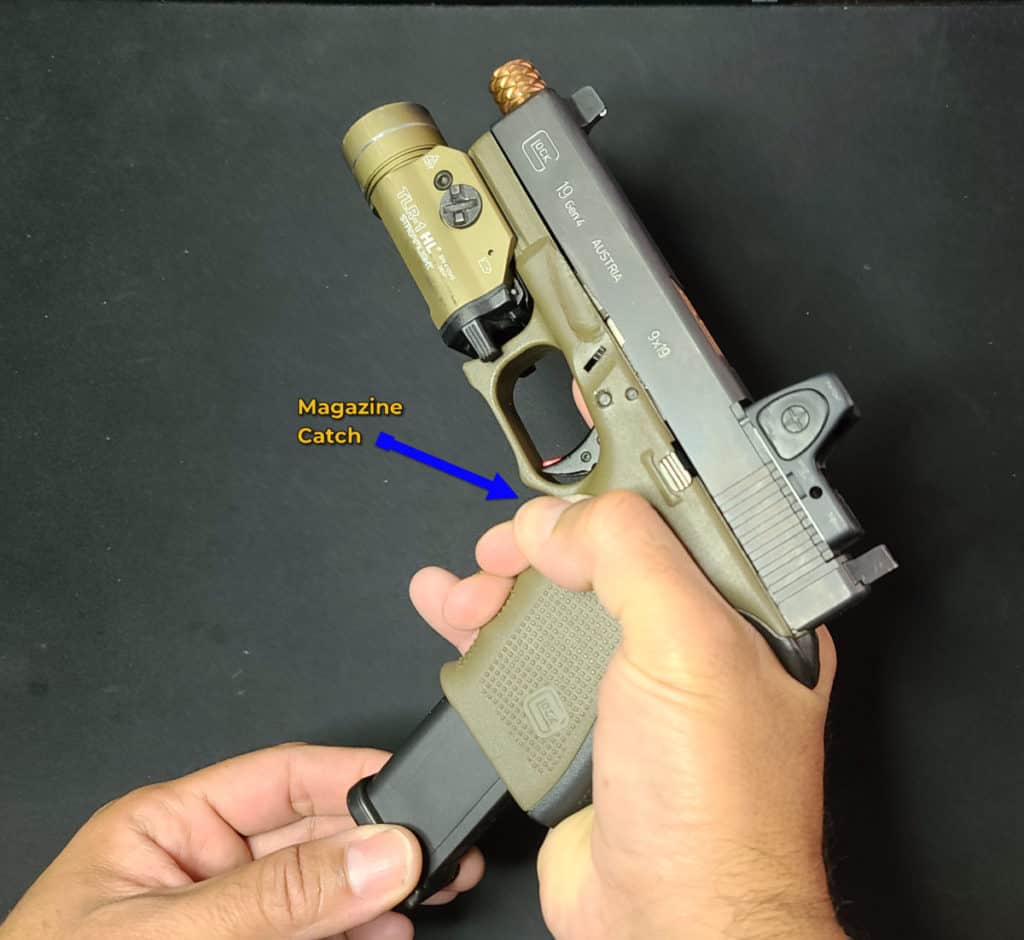
1. Take the magazine out
Depress the Magazine Catch button (a.k.a. magazine release) inwards (→) to release the magazine.
In some handguns such as the Walther ??? the magazine catch is in the bottom of the trigger guard and needs to be pushed down to release the magazine.
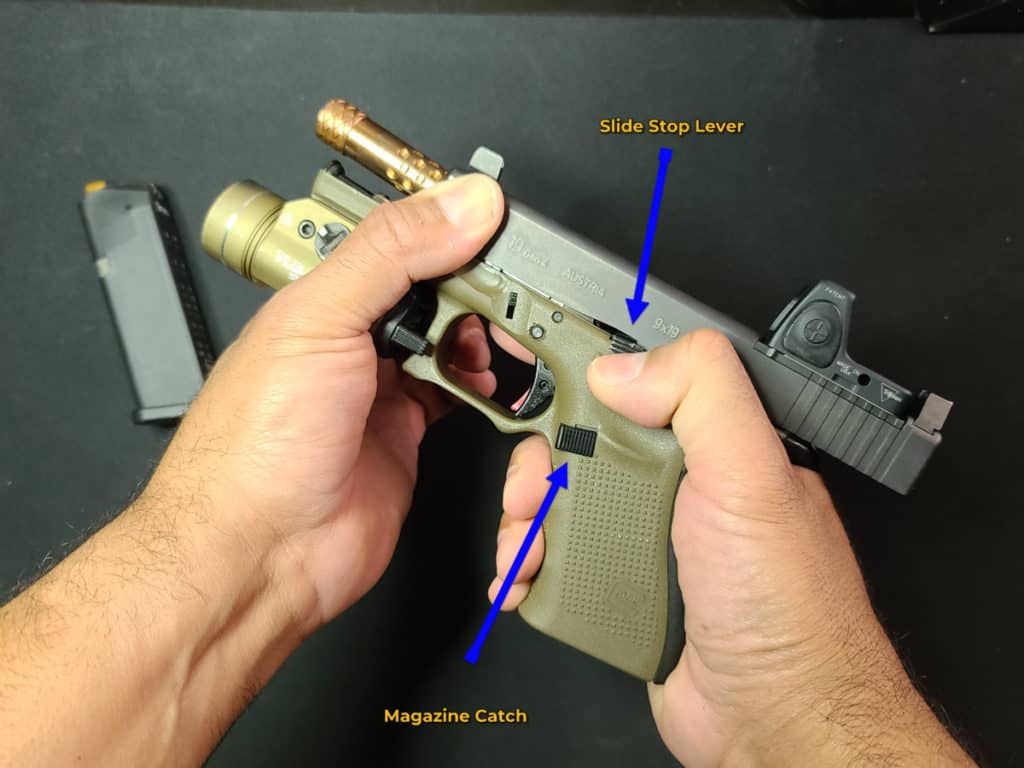
2. Pull the slide to the rear and lock it with the slide stop lever
Using the rear of front serrations of the slide, you will pull (or push as shown in the picture), while maintaining pressure upward (↑) on the slide stop lever. You will feel the slide lock lever catching on the notch, at that point you can let go of the slide forward, and the slide will remain locked in the rear position
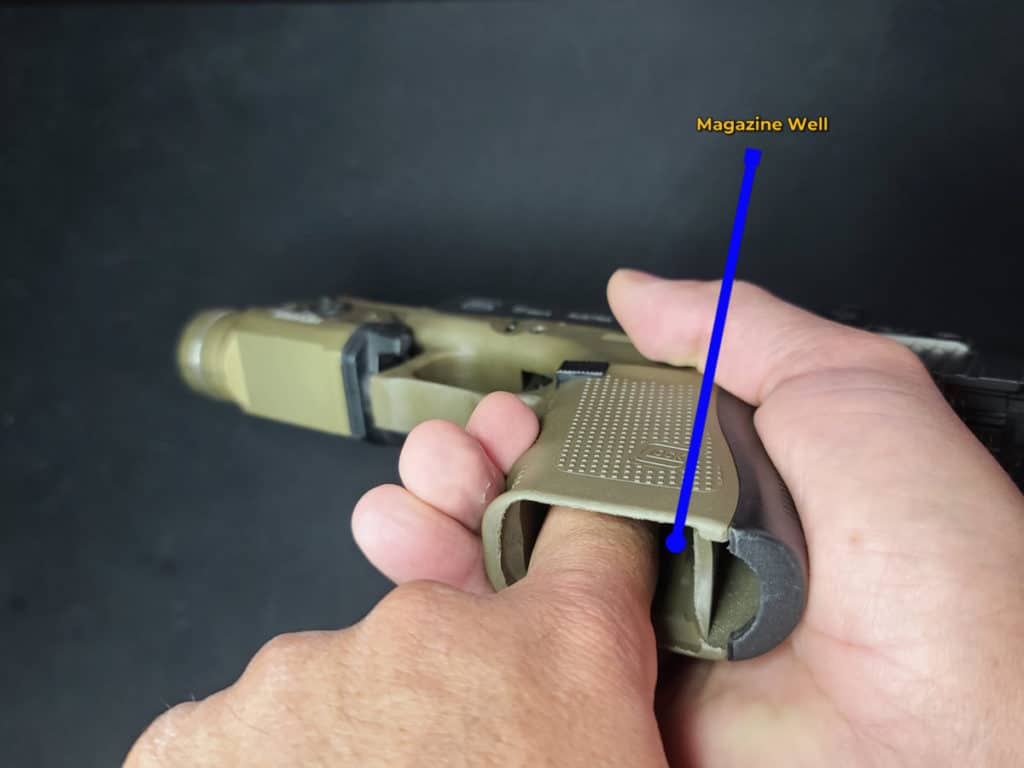
3. Check magazine well, and chamber for ammunition
At this point, you want to observe the magazine well to be empty, and the chamber (rear portion of the barrel, inside), to make sure there are no rounds (ammunition).
In addition, you want to physically verify that the magazine well and chamber are clear from any ammunition.
“In overconfidence, we find danger”
Ron Ackerman
After more than 30 years of manipulating firearms, I still perform a visual and physical check for rounds. It does not take too long to do, and it does not hurt to be very sure.
If there is something you learn with the years is to not trust your eyes…

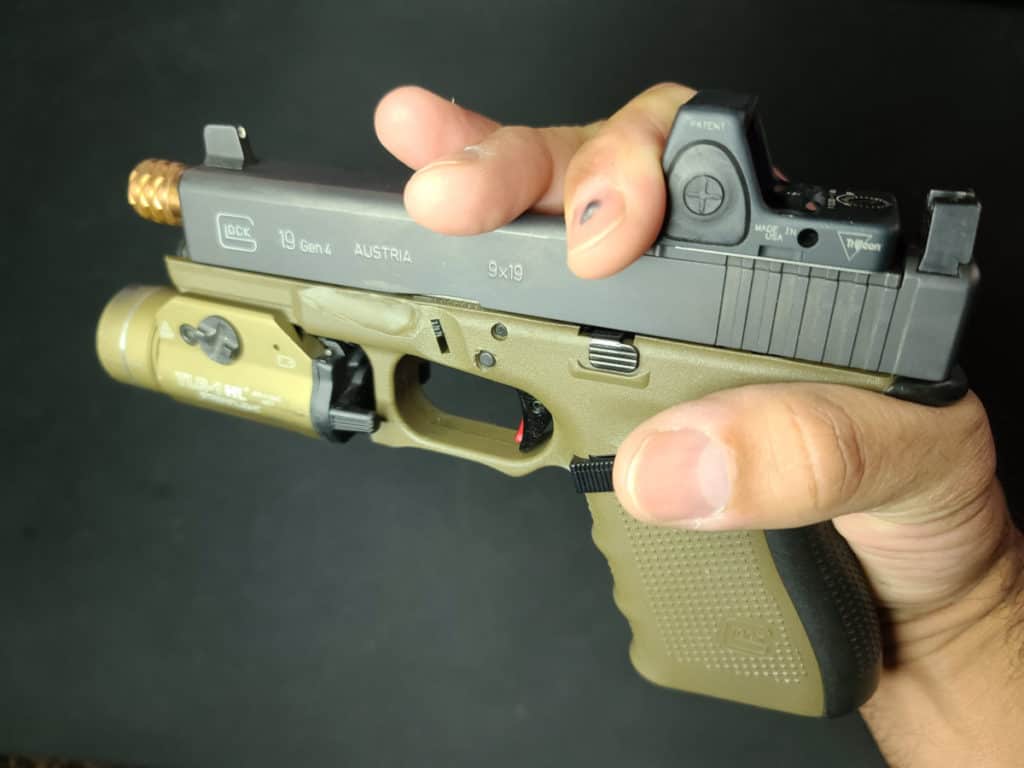
How to disassemble a handgun? (Glock disassembling)
Some firearms required you to pull the trigger in order to remove the slide. Glocks are this type.
A. After the firearm is clear of any ammunition, point it in a safe direction and pull the trigger.
B. With your dominant hand, pull the slide back slightly.
C. While holding the slide back, pull the slide lock down evenly from both sides.
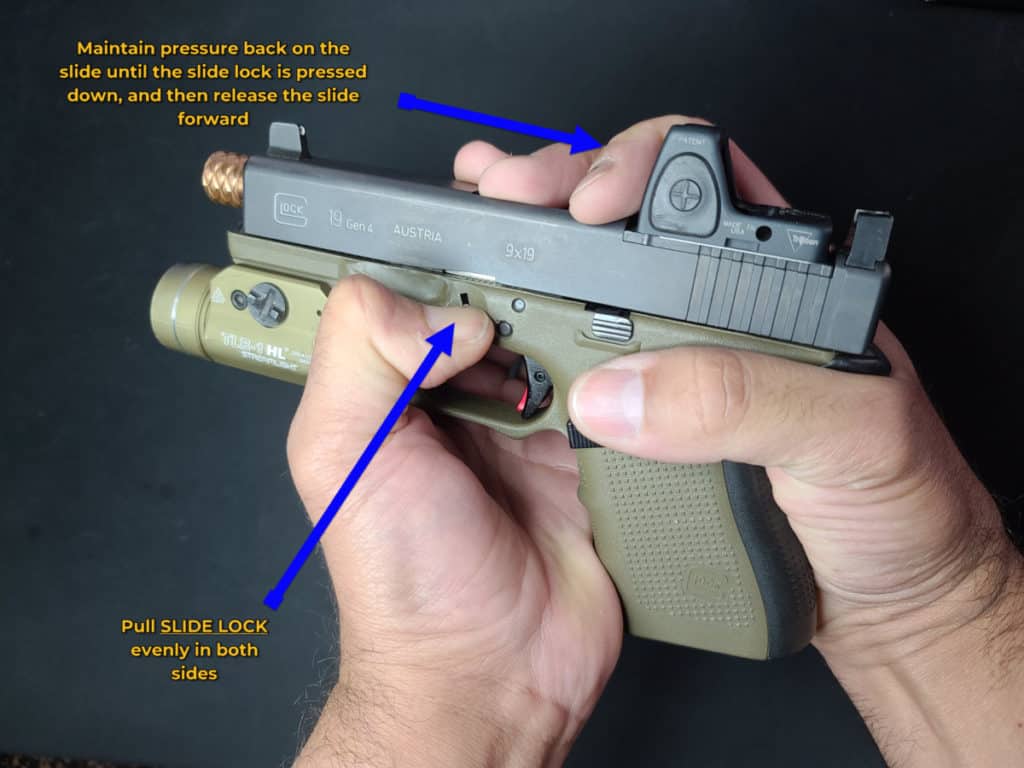
D. While holding both sides of the slide lock, release the slide forward and then push it with your thumb forward.
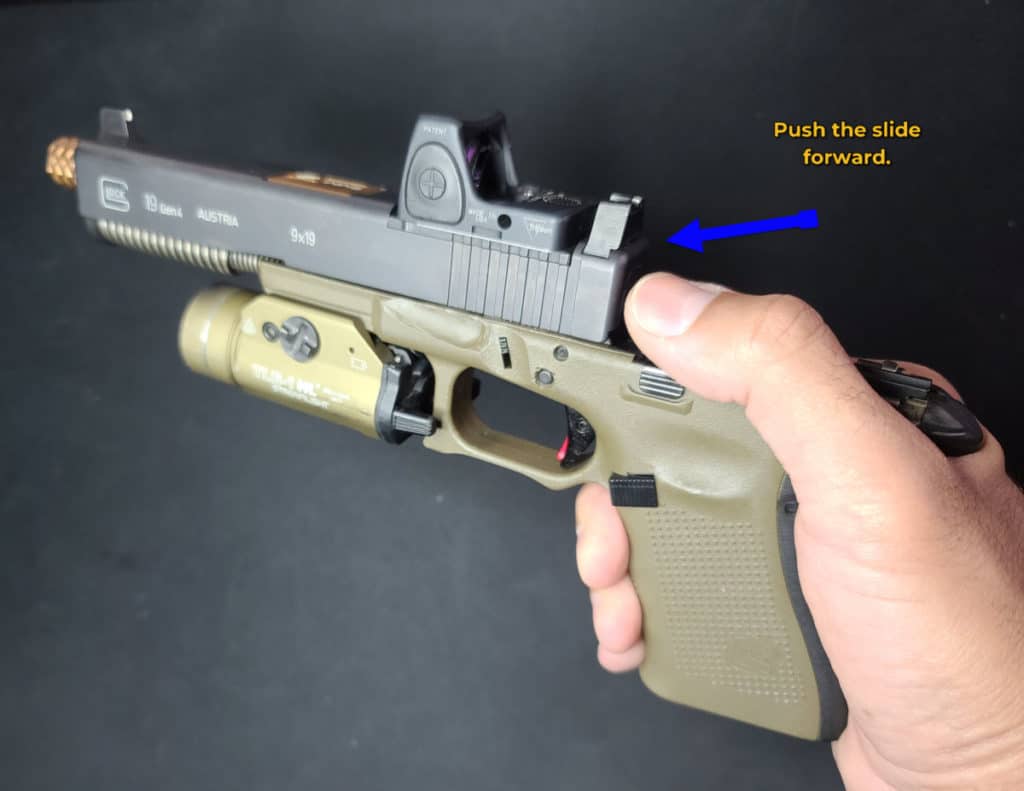
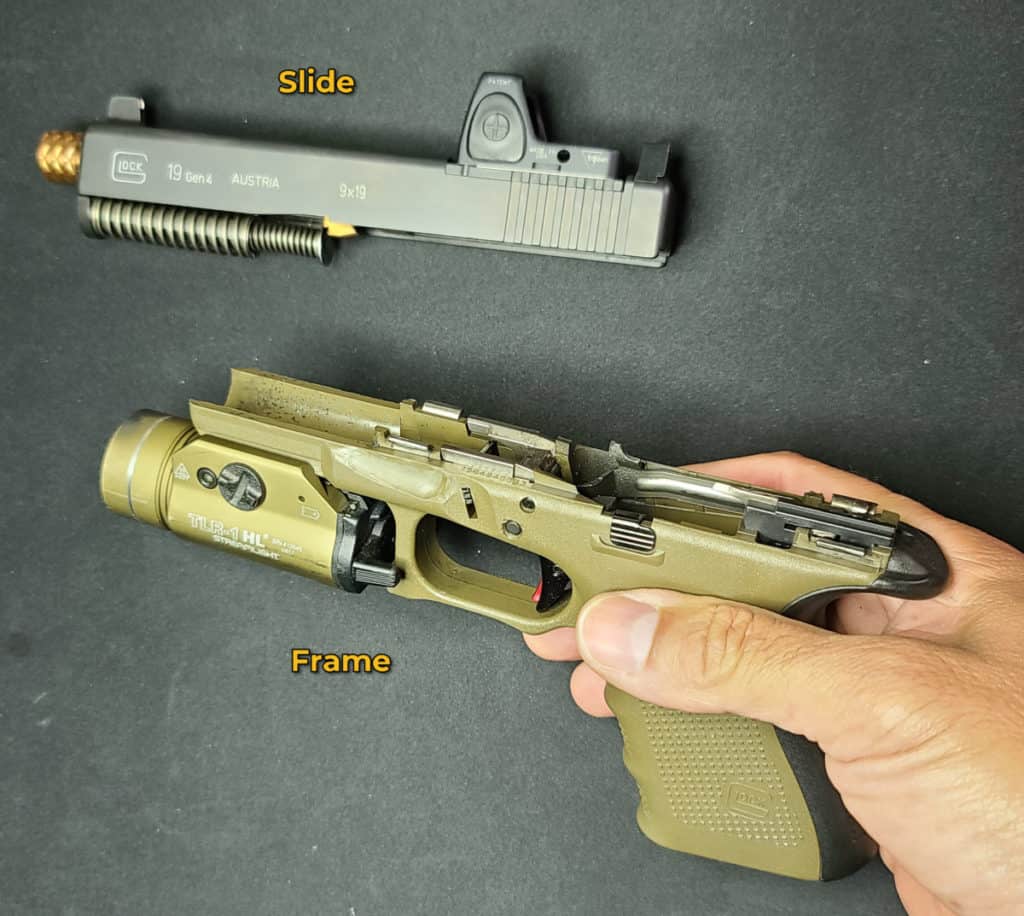
E. At this point you have the slide and the frame separated.
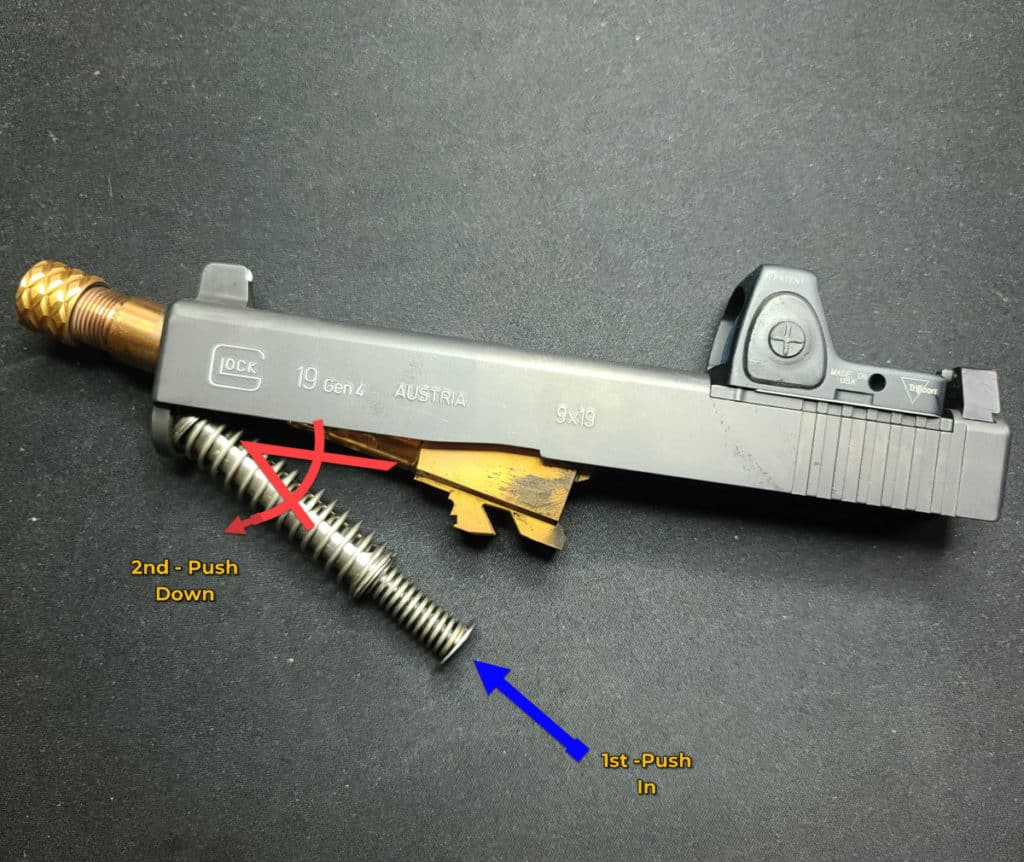
F. Remove the Recoil Spring by pushing it forward and detaching it from the frame.
G. Remove the Barrel by tilting it and sliding it out of the slide.
This is as far as you need to go -and what is recommended by most manufacturers- in the breakdown to perform a gun cleaning.
Items needed for gun cleaning
The basic items required to clean a firearm are:
- Cleaning Rod with Bore Brushes
- Cleanig patches
- Gun cleaning solvent
- Cleaning rags
- Cleaning brushes
- Firearm Pick Cleaning Sets
- Gun Oil
How to clean a pistol
1. Wipe excess dust, dirty, grimme off the frame internal parts and inside the slide.
Using a clean rag, wipe all excess grime off the internal parts of the handgun.
Do this until the rag comes out fairly clean. Doing this pre-cleaning task will reduce the time of cleaning and the products used in the process.
2. Run a clean patch through (inside) the barrel.
Very important: The cleaning of a barrel is to be done from the rear (where the bullet enters) towards the front (where the bullet exits. Doing this will protect the bore edge inside of the crown of the barrel.
The bore edge of a barrel is the last part of the barrel touched by the bullet as it exits the firearm. This part of the barrel is critical to the accuracy of the firearm, and any defect or damage at the bore edge will jeopardize the accuracy of the projectile. Hence the need to protect this area while cleaning the firearm.
3. Apply solvent to the internal side of the slide.
Using a toothbrush or a gun brush apply some gun solvent to the inside of the frame, making sure to wet the rails and the breach, near the ejection claw.
4. Apply solvent to the internal parts of the frame.
Using the brush to apply gun solvent liberally to the internal component of the frame, making sure to touch the internal corners and hard-to-reach areas.
5. Run a bore brush with gun solvent.
With the bore brush soaked in gun solvent, run it from the rear to the front of the barrel at least 3 times – more times may be required depending on the time and use of the firearm since the last cleaning.
7. Clean the face of the breech faced and the ejector claw.
This area of the handgun is extremely important for the proper functioning of the handgun and is often neglected.
With a wire brush remove all sediment in the breech face and the ejector claw, then with a gun pick and a magnifying glass clean the corners of the breech face, and underneath the ejection claw.
Do a final pass of the brush in these areas, and wipe the excess solvent.
8. Wipe all solvent from the slide and the frame.
Dedicate some time to thoroughly wipe all solvent from the slide and frame.
The goal is to get it as dry as possible. A good test of proper cleaning is to run a white clean cloth through the internal parts and clean those areas that still show some signs of dirt.
Wipe as needed for the white cloth to come out clean.
9. Run a clean bore patch through the barrel.
Using as many patches as needed, the goal is to observe the patches come out the front of the barrel, clean.
10. Oil the firearm as recommended by the manufacturer.
A common mistake is to overlubricate the firearm, this comes from an obsolete mentality that a hyper-lubricated gun works flawlessly. This is not the case and in fact, it creates the opposite result by collecting more grime.
Overlubricating firearms have the adverse consequence of staining everything it touches (i.e. your clothes) and makes the handgun slippery when grabbing it.
11. Reassamble the handgun.
To reassemble the firearm, start by placing the barrel inside the slide, then place the recoil spring in, then align the rail cutout of the slide with the rails of the frame, and slide the slide on the frame, from the front of the back.
While sliding the slide back, to do it slowly, do not attempt to force the slide on the frame.
You may need to wiggle the slide a little in order to finesse the slide into the frame.
12. Perform a function test.
Performing a function test in a Glock means to pull the trigger and hold it back, then cycle the slide (pull back and release), and then slowly release the trigger until you hear the trigger reset. At this point, we know the components of the handgun were assembled properly and are functioning as intended.
Cleaning a gun is less complicated than many make it out to be.
Can I shoot somebody from my moving vehicle in self-defense?
As the saying goes, there I was minding my own business... driving down the interstate, and as you got off the next exit, you noticed a white pickup truck behind you, to close for comfort, but being...
A firearm malfunction is a state in which the weapon cannot fire the round as intended. Most malfunctions can be group into a) Mechanical, or b) ammunition related. There are various causes to a...